V. After You Launch
Guide your leads through the funnel
Getting people to visit your website is hard enough. The trouble is, once people visit and leave, there’s no way to stay in touch with them.
Every business has a funnel that describes how people go from being the target market to becoming customers. Funnels look something like this:
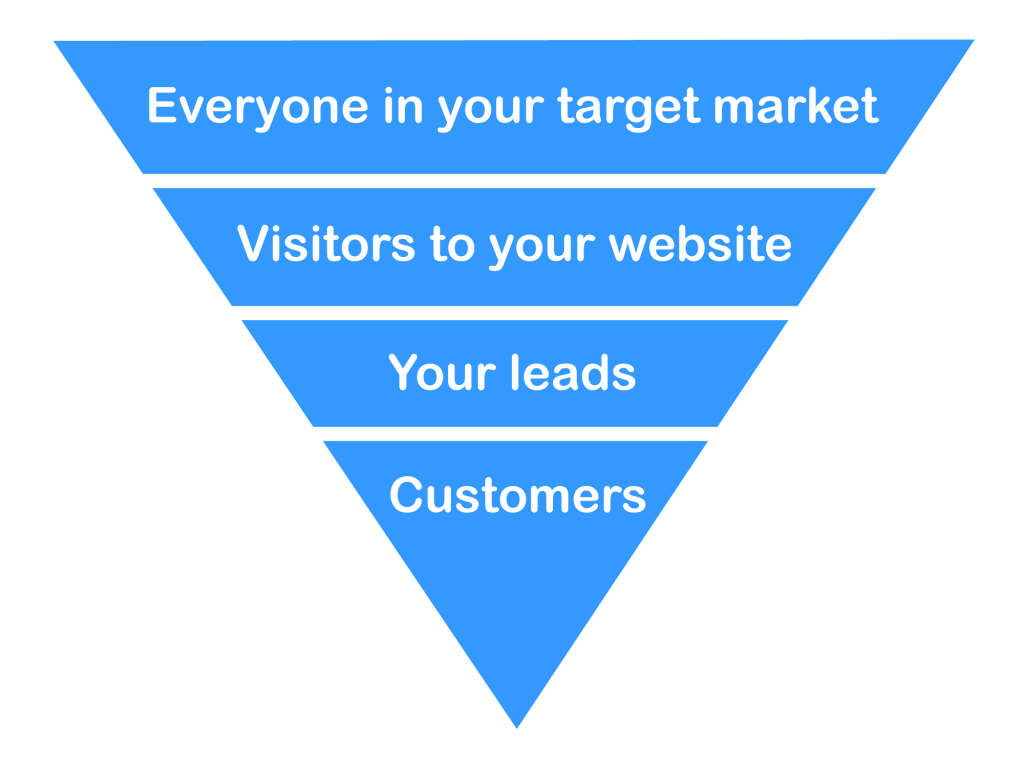
Traditional online marketing funnel
People rarely become a lead on their first visit to a website, and trial users don’t always convert immediately.
It’s helpful to think about the timeline behind a purchase. The folks at Jobs to Be Done1 have one that looks like this:
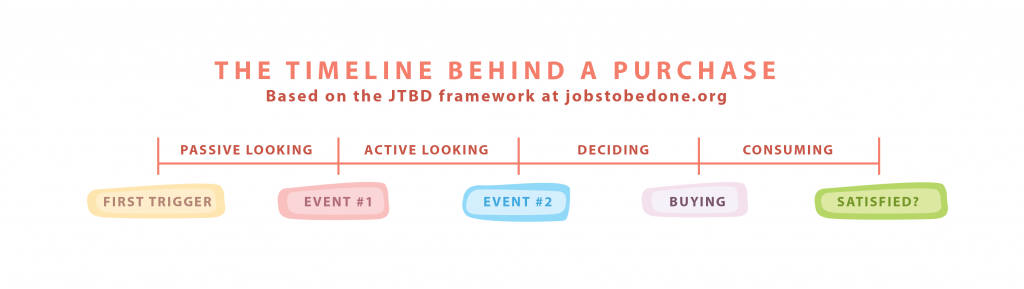
A purchaser goes through different phases before she buys
You attract people during the passive looking stage (that was the previous chapter). They hopefully visit your website during the active looking step. Now, you have to guide them through the deciding phase.
Some decisions happen in an instant: “I heard this Android app is popular, I’m going to buy it now.” Others can take months (think enterprise software).
Tweetbot is my favorite Twitter app for the iPhone. I heard about it in 2011. When I visited the website, I left without buying. However, I kept hearing people talk about Tweetbot; mostly on podcasts. Sometimes these were paid advertisements, but other times it was because the hosts were gushing about how much they loved it. One day Twitter updated their official app to show more ads in the timeline. I decided I’d had enough and bought Tweetbot for $4.99. The year? 2014. It took me three years from initial contact to actual purchase.
This goes contrary to much of our thinking about marketing. Most of us believe that people see an ad for our product and instantly go and buy.
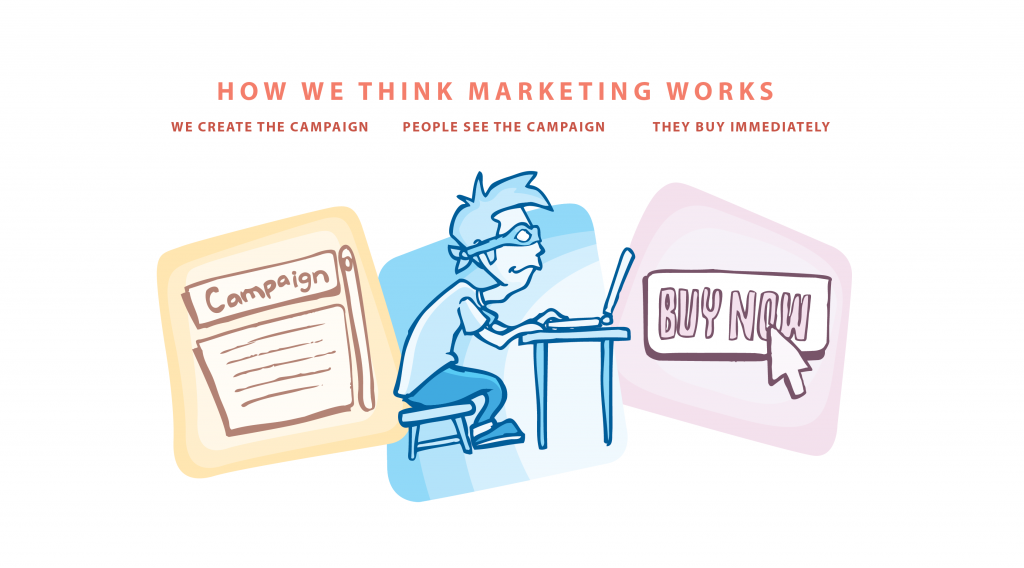
Most purchases don’t work this way
Most products (even apps) require that you nurture your leads. Nurturing leads requires that you capture some information about people who view your product, and use that information to remind that your product exists!
Here are some ways to guide your leads toward a purchase.
Write an email course
My best conversion rates come from a 5-part email course. What’s an email course? It’s an automated sequence of emails that you drip out daily or weekly. The idea is that you give the reader an easily digested lesson in each email.

trydesignlab.com/responsive-web-design/
Structure the content for your email course
Email courses work best if they’re 5–7 days of content. Most email courses are daily: you subscribe and get lesson 1, and then the subsequent lessons come each day after that.
You may already have content written that you can use for an email course:
- Break up a long, tactical article or white paper into five lessons.
- Already have a blog series on a topic? Convert each post into a lesson!
- Ask people for questions on Twitter or by email, and turn your answers into email lessons.
How do email courses help nurture your leads?
Each day, you’re giving the subscriber something valuable. This builds trust and rapport with the prospect. Your lessons should also naturally lead to your product.
For example, in one lesson you might describe a DIY approach to solving a problem. The email outlines all the steps they would need to take to do it themselves. At the end of the email, you explain that there’s an easier way: your product. This is exactly the approach that Bidsketch’s Reuben Gamez uses in his course:
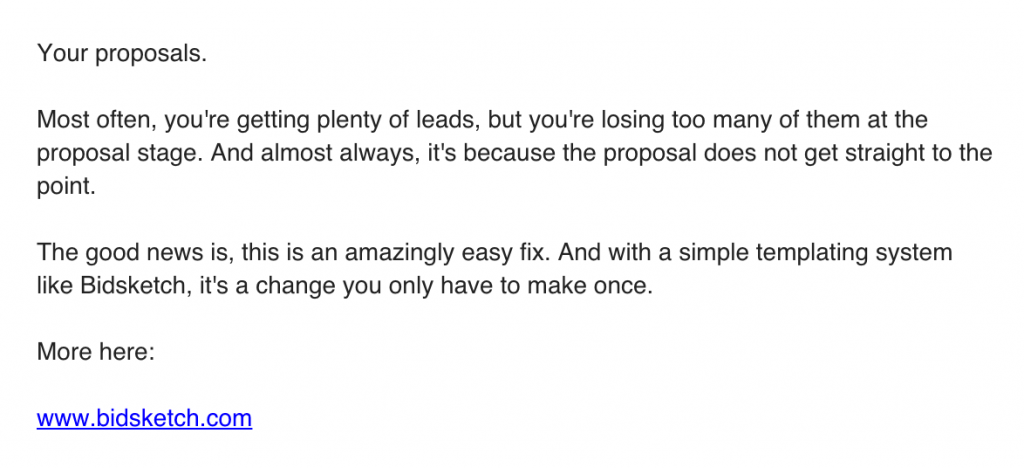
The end of Reuben’s Bidsketch email
Delivering an email course to subscribers
The user flow is going to look like this:
- Someone visits your homepage, landing page or blog.
- On the page, you have a call to action (similar to Design Lab’s above) that asks the visitor if they want to subscribe to get 5–7 lessons by email.
- They enter their email address.
- Your email system automatically sends them the first lesson in your drip sequence. Every day following, the subscriber receives an email.
There are a few different tools you can use to create email courses:
MailChimp
MailChimp recently released their automation feature to all users. Automation allows you to create drip sequences easily.2 Their drag and drop interface for arranging lessons is particularly helpful.
ConvertKit
ConvertKit has email courses baked right into their primary service. When you create a new course you’re given an email sequence template to edit:
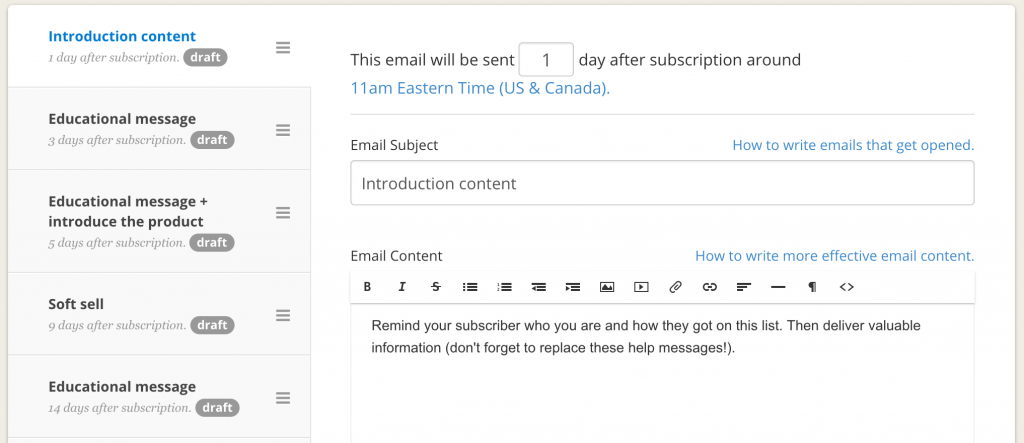
ConvertKit has pre-made email course templates
Current pricing for ConvertKit starts at $29 for up to 1,000 subscribers. Their target market is professional bloggers, so if you’re building an info-product, they might be a good fit.
The team there has steadily increased the app’s automation functionality. You can now tag subscribers and trigger event automation with link clicks, purchase events, or subscription events.
Drip
I’ve tried all four of the email marketing tools here, and Drip is the most robust (especially for those with SaaS products). Conversion tracking is built in, allowing you to see if your course is resulting in more customers.
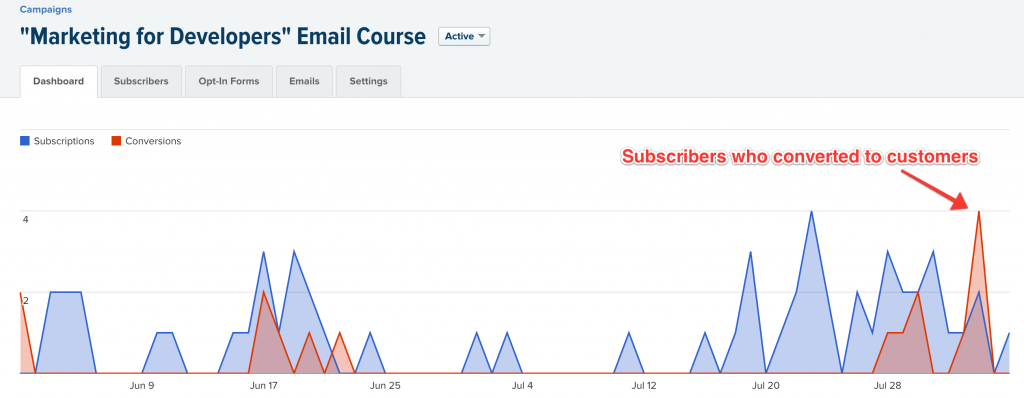
Drip’s campaign reports include conversion tracking
Drip also has my favorite subscription widget: it’s a little tab that sits on the bottom right-hand side of your website and pops open after a timed delay.
For some of my SaaS clients, we’ve achieved 30% visit-to-trial conversion rates using Drip’s system.
Use retargeting ads
How does retargeting work? When a visitor comes to your website, your site drops an anonymous cookie in their browser. When the visitor leaves, they start seeing your ads on Facebook, on Google, or even on mobile apps.
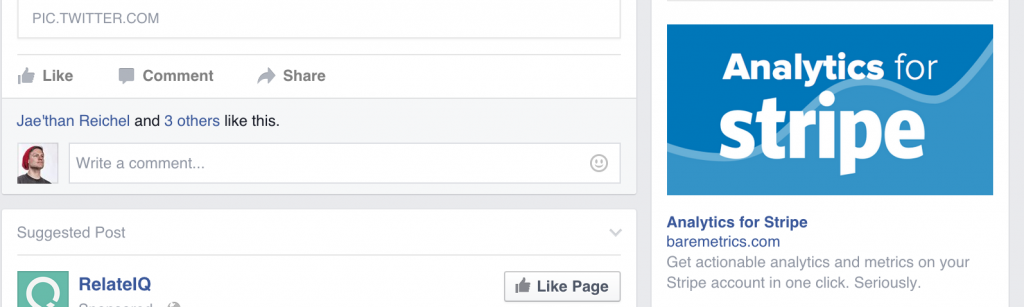
Guess whose website I visited right before going to Facebook?
Retargeting (or “remarketing” as Google calls it), is a way to remind people of your product, long after they’ve left your web page.
Start on Facebook
The easiest way to get started with retargeting is on Facebook’s ad platform. They’ve developed good tools for building ads, and most campaigns are approved with minutes of being launched.
Step 1: Sign up
- Go to facebook.com/business and click “Create an ad.”
- Choose either “Increase conversions on your website” or “Get installs of your app” (if you have a mobile app).
- Facebook will ask you to install a conversion tracking pixel on your site. In most cases, you’ll add it to the purchase confirmation page (or newsletter sign-up confirmation page). Example: /thank-you.html
- Next, give your campaign a name. Remember, a campaign can have multiple sets of ads, so it’s best to be general.
Step 2: Create an audience
In step 2 of Facebook’s ad creation process, they’ll ask you to choose an audience. Click the Create Custom Audience link, and you’ll be brought to this screen:
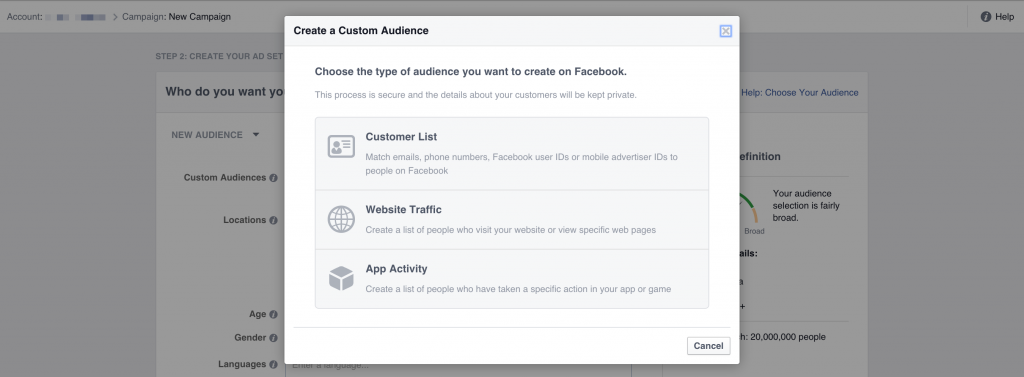
Facebook offers three types of retargeting
We’re going to start with Website Traffic. When you click that option, you’ll be asked to install another snippet on your website, a “custom audience pixel.”
Next, you’ll define how much of your traffic you want to track for retargeting. If your traffic is low, you may want to track the last 60–90 days (you can go up to 180 days).
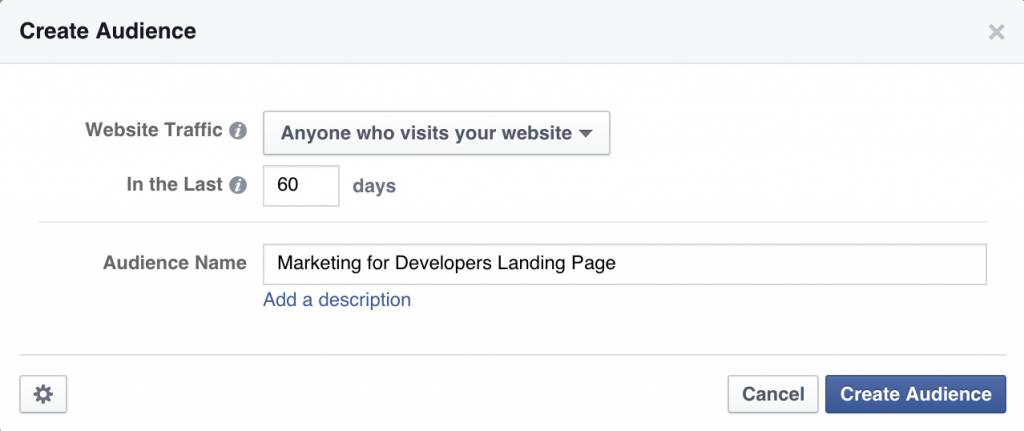
Define the parameters
At this point, you haven’t cookied any of your website visitors with Facebook’s tracking pixel, so you won’t be able to target them quite yet. You can either wait for that to happen or create other retargeting audiences.
You can also have Facebook match your email subscribers. They have billions of email addresses hashed in their system: when you upload your list, they hash your addresses and then match the hashes. To upload a list, click the Create Custom Audience link again. You can connect directly to MailChimp (if you’re using that) or upload a CSV.
Step 3: Define your budget
You enter your budget details in this screen here:
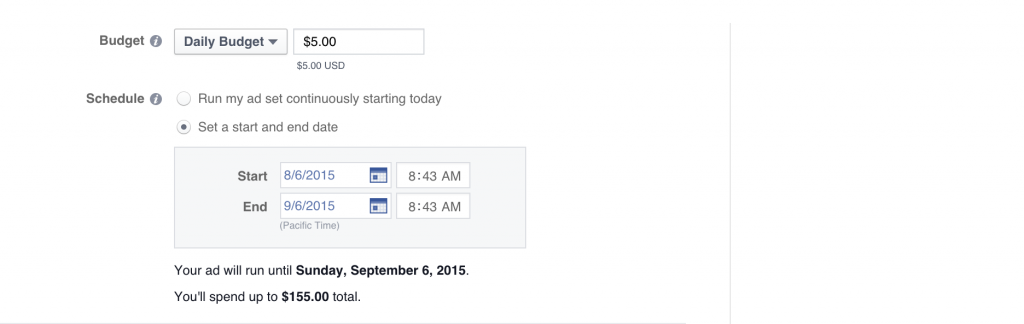
Facebook will show you how much you’ll spend
Now you’ll need to decide how much you can spend. There are two different approaches I’d advocate here:
- Set it and forget it: if you can’t spend time tweaking ads as they run, I’d allocate $150 for 30 days ($5 per day).
- Focused week-long test: if you’re able to dedicate some time and resources to your ad campaign, try upping your daily budget to $25–$100. Keep a close eye on it! If, after a day, you’re not getting the conversions you want, kill that ad variation and try another one. Repeat the process over 5–7 days until you find something that works.
Step 4: Create your ad
Once you have a big enough audience, you can create your ad variations. Here are a few choices you’ll need to make:
- Display a single image or multiple images? If you’d like to show a series of screenshots, you can show a carousel of five images in your ad. Otherwise, you can have your ad feature a single image or video.
- Image variations: For each campaign, I’d recommend uploading multiple images. Each image you upload will create a new variation on your ad. Facebook will track the effectiveness of each image and will automatically start showing the best-converting image for you.
- Text and links: You’ll also need to write your ad copy. The most effective ads focus on the struggle: “Ambassador makes referral programs easy.” Or center on the solution: “Get your theatre tickets instantly.”
- What variations you’ll run: You can run your ads on Facebook’s Desktop Newsfeed (the main column in Facebook), the Mobile Newsfeed, Desktop Right Column, and Audience Network. If you have a SaaS product or an informational product (like an ebook or a course) I would focus on the Desktop Newsfeed and Right Column only. Mobile apps should focus on Mobile Newsfeed. Don’t use the Audience Network.
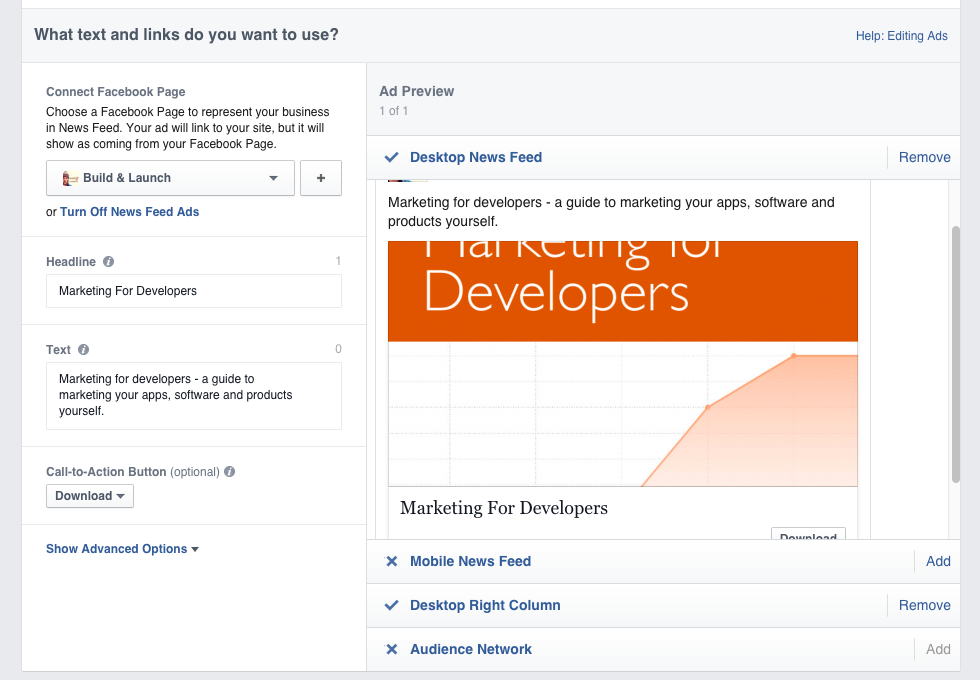
Choose where your ads will run on Facebook
With this last step done, you can place your order. It usually takes a few hours for Facebook to approve your ads.
Step 5: Evaluate your campaign
To properly evaluate your campaign, you’re going to need to determine the lifetime value (LTV) of a customer. If you have a mobile app, your lifetime value might be 99 cents. If you have a SaaS, it might be $480 ($20 x 24 months).
Now, look at your Performance graph in Facebook Ads:
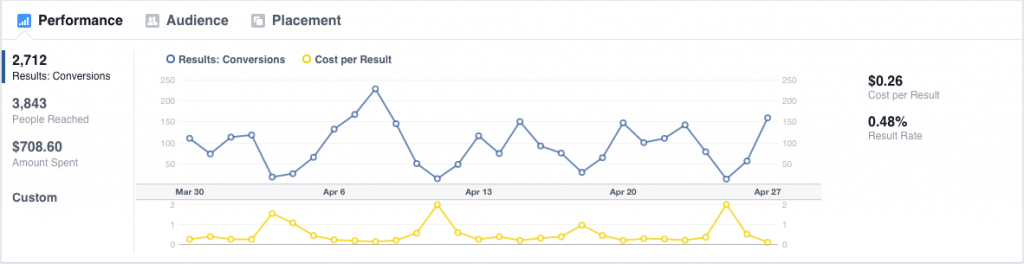
Facebook ads performance graph
This will show you the number of conversions you achieved over time and how much it cost to get them. If you’re selling a mobile app where you receive $0.99 on every unit, and your cost per result is $0.26, you’ve made $0.73 on average per sale. That’s a decent return on investment. Conversions from retargeted ads usually cost less than regular ads.
You should keep advertising if the cost of acquiring the customer is cheaper than your sale price. Finding an ad channel that works is difficult, but when you find one it allows you to double-down and easily earn more income.
Facebook will also give you demographic information on who is responding to your ad. This data can be helpful as you look for other channels to promote your product on:
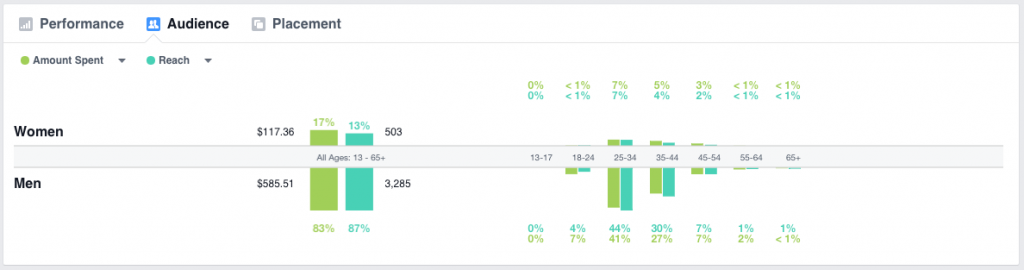
Facebook Ads’ demographics
Final ask
Use the techniques above to keep your leads warm! Someone who’s expressed interest in your product may need just a little nudge to order your product.
In the next chapter, we’re going to talk about how to ask for the sale.
Footnotes
-
jobstobedone.org ↩
Buy the EPUB & PDF to read offline and support the work.
Buy the book — $10